How WeLoyal Runs at the Counter: Scanner App, POS Integrations, Team Permissions, and the API
How staff scan WeLoyal digital loyalty cards, connect Toast, Square, and Shopify, set manager permissions, and use the REST API and webhooks behind the system.
WeLoyal is a digital loyalty card platform that lets businesses run stamp cards, cashback programs, memberships, and gift cards directly through Apple Wallet and Google Wallet, without paper cards, plastic cards, or a separate app for the customer to download. Everything covered on our blog so far has looked at this from the customer's side of the counter: what a card looks like once it is sitting in someone's phone. This post looks at the other side. How does a member of staff actually process a scan? What happens if a business already runs on Toast, Square, or Shopify? How does an owner give a part-time employee limited access without handing over the entire dashboard? And for the more technical businesses reading this, how does the API and webhook layer actually work under the hood?
This is the operational backbone of the whole system, and it is worth understanding in depth because it is usually the part that decides whether a loyalty program actually gets used consistently on a busy Saturday, or quietly falls apart within a month. If you are still choosing which reward mechanic fits your business, start with our guide to the 8 WeLoyal card types, then come back here to see how those cards run in real operations.
What is the WeLoyal Scanner App?
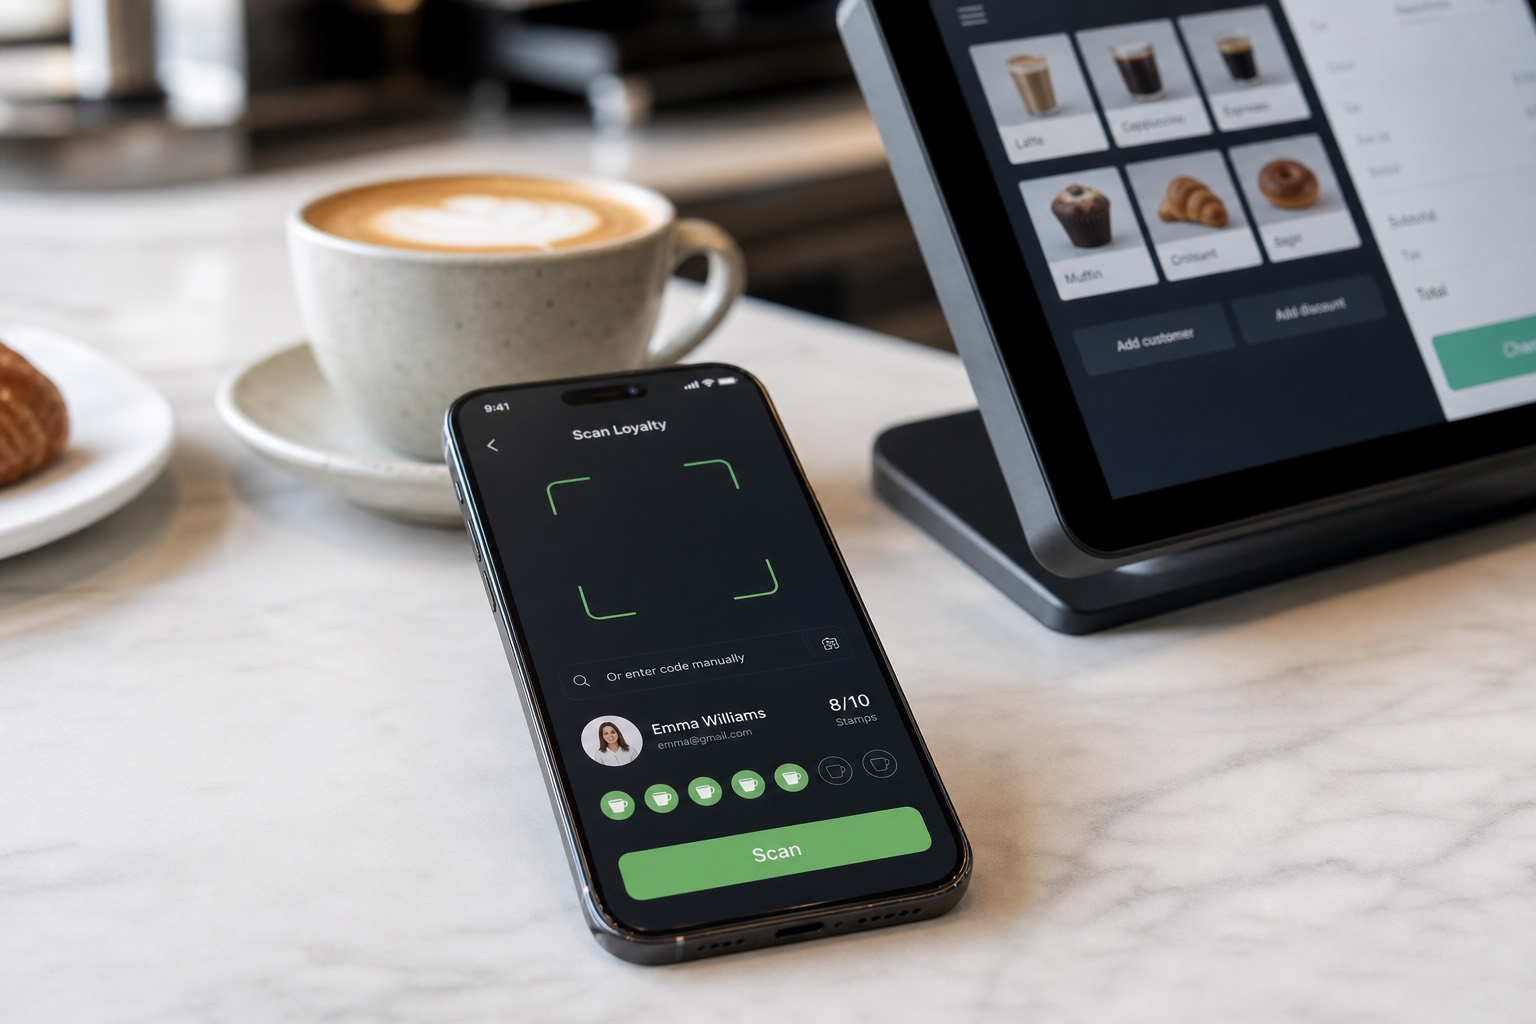
Every loyalty card in the system, regardless of type, gets processed at the point of service through the Scanner App. It is worth being precise about what this actually is, because the name undersells it slightly. It is not a piece of hardware you have to buy, and it is not something that needs installing from an app store. It is a browser-based application that runs on any device with a camera and an internet connection: a phone, a tablet, an old laptop sitting behind the till, whatever you already have lying around. Staff open a link, log in, and the scanner is ready to use.
Getting into the scanner works one of two ways. The account owner can log in with the same email and password used for the main dashboard, which makes sense for a small operation where the owner is also the one running the till. But for anything beyond a one-person operation, the far more common approach is logging in through a manager profile, a separate set of credentials created specifically for a staff member, which we will cover in detail below. Once logged in, the scanner adds itself to the device's home screen like a normal app icon, so staff are not hunting for a bookmark every shift. They just tap the icon and they are in.
How staff process a scan in practice
Using it in practice is deliberately simple. A staff member taps Scan, the device camera opens, and they point it at whatever code the customer's wallet card is displaying. If a customer does not have their phone out for some reason, staff are not stuck either. There is a manual search function that pulls up any customer by name, phone number, email, or the card's unique serial number. Once a card is found, whether by camera or by search, the scanner immediately shows the cardholder's full standing. Depending on the card type, that might be their current stamp count, their available balance, their remaining visits, or whether their membership is currently active, along with the personal details they filled in when they first installed the card.
From there, actually processing a transaction is a small handful of taps. For a points or cashback-based card, staff use plus and minus buttons next to a running counter, or they can type an exact figure directly using the on-screen keyboard rather than tapping one at a time. For redemptions, a confirmation window appears before anything is finalized, showing exactly what is about to be deducted, giving staff a chance to catch a mistake before it is locked in, and letting them attach an internal note if needed, something only visible on your side, never to the customer. This confirmation step matters more than it sounds like it should, because it is the difference between a fast, error-prone system and one where a rushed employee at the end of a long shift can still get it right.
What is Kiosk mode on the Scanner App?
For businesses that want an even lighter-touch experience, there is a setting called Kiosk mode, and it is genuinely one of the more useful pieces of the whole system. Rather than a staff member manually adding a stamp or a point every single time, Kiosk mode lets accrual happen automatically the moment a card is scanned, with no button presses required beyond the scan itself. This works for card types built around points, stamps, and rewards mechanics, and it turns the scanner into something closer to a self-service checkpoint. That makes it ideal for a busy counter where a staff member genuinely does not have ten seconds to spare per customer, or for a setup where the device is simply mounted near the register for customers to tap themselves against.
Only the account owner or an administrator can turn Kiosk mode on or adjust how it behaves. A staff member logged in as a manager can use the scanner in Kiosk mode but cannot change its settings, which is a sensible safeguard against a well-meaning employee accidentally reconfiguring accrual rules mid-shift. And because getting the accrual logic exactly right matters, the system is built to be tested safely first. You can run Kiosk mode on a dummy test card before flipping it on for real customers, confirm it behaves exactly as expected, and only then trust it with live traffic. If you ever decide automatic accrual is not right for your business after all, switching back to fully manual scanning takes seconds. Nothing about turning Kiosk mode on locks you into it permanently.
Does WeLoyal integrate with Toast, Square, Shopify, and other POS systems?
For businesses that already have a point of sale system handling transactions, the more powerful setup is connecting that system directly to the loyalty platform, so stamps, points, or cashback accrue automatically the moment a sale goes through, with no separate scan required at all. See the integrations overview on the homepage for the product view; below is how those connections behave in day-to-day use.
Toast POS for restaurants
The integration with Toast is a strong example of how deep this can go for restaurants specifically. Once connected, four card types become available to run through Toast directly: reward, stamp, discount, and cashback. You can configure accrual right down to the level of specific menu items, awarding stamps or points only when particular products are purchased rather than on every single sale, and you can build rewards that only apply to certain items on the menu, complete with usage limits and time-based restrictions, like a reward that can only be redeemed twice a month. When it works well in practice, a server simply looks up the customer inside the Toast interface itself, applies any available reward directly to the check, and the whole loyalty transaction rides along on top of the payment that was already happening, with no extra hardware and no separate step for the guest.
Shopify, Square, Lightspeed, and GloriaFood
The pattern with e-commerce and retail POS platforms like Shopify, Square, Lightspeed, and GloriaFood follows a similar logic, even though the exact setup steps differ slightly per platform. You connect your store or account, choose which card type the integration should run on, typically stamp, cashback, discount, or reward, and define an accrual rule: whether points should be earned on the entire receipt, only once a purchase crosses a minimum amount, or only for specific items. From that point on, every completed order is automatically checked against your customer list. If the person paying already has a phone number or email matching an existing loyalty card, points are credited immediately. If they are brand new to your business, the system creates their profile and issues them a card automatically, sending the install link out through whichever channel you have set up, email or SMS, without anyone on your team having to lift a finger. Cancel or refund an order, and the points that were awarded get pulled back out automatically too, keeping balances accurate even when a sale does not go through as planned.
There is one detail worth understanding clearly if you are running a stamp or points-based reward card through most of these retail and e-commerce integrations. Unlike the deeper Toast integration, accrual through the marketplace connections generally has to happen through the scanner for these mechanics. Automatic accrual through the store checkout itself is not available for every card type on every platform. It is a detail worth checking against your specific setup before you assume everything will run entirely hands-off.
WooCommerce cashback for WordPress stores
For a WordPress store running WooCommerce, the integration works slightly differently again, built specifically around a cashback card. The moment someone registers an account on your WooCommerce store, they are automatically issued a cashback card, and every purchase and redemption after that syncs both ways between your store and the loyalty platform. A widget sits directly on your shop page showing the customer their earned points and letting them redeem straight from your website, generating a coupon code they apply right at checkout. For more on how cashback mechanics work on the customer side, see the cashback card guide.
How do WeLoyal manager profiles and team permissions work?
Once you are running a business with more than one person behind the counter, handing every employee the full owner login is obviously not something anyone wants to do. This is where manager profiles, sometimes called team member seats, come in, and the permission system underneath them is genuinely detailed once you dig into it.
Creating a manager takes a few basic details: a name, an email, a contact number, and a password, along with an optional note field for anything you want recorded about that staff member internally. You can also assign a manager to a specific location if your business has more than one, or leave that setting alone entirely so the manager can service every card across your whole account. There is a toggle to control whether the new manager receives an automatic email invitation with their access details, useful if you would rather hand credentials over in person instead.
Granular permissions you can turn on or off
What makes this genuinely useful for a real business, rather than just a basic login split, is how granular the permission controls actually are. Each manager profile can be individually configured with access to specific capabilities, and only those capabilities:
- Revenue statistics, so a junior staff member can process scans without ever seeing your business's income figures
- Feedback statistics and referral performance data
- Detailed per-customer engagement history
- Template viewing versus template editing or creation
- Customer list viewing versus editing (name, phone, tags, birthdays, and so on)
- Sub-account controls for multi-location or franchise setups
- Payment visibility, plan changes, and account snapshots
It is worth knowing that report generation specifically is reserved for higher-level roles only. A standard manager, regardless of how many other permissions they have been given, cannot generate full reports. That is a deliberate limitation built to keep the deepest business analytics in fewer hands even when day-to-day operational access is shared widely.
In practical terms, this means a business with a front-of-house team, a shift supervisor, and an owner can give each of those people meaningfully different access. Front-of-house staff get scanner access and nothing else. A shift supervisor might additionally get customer editing rights and feedback visibility. The owner keeps the only login with full revenue, billing, and reporting access. Every account supports building out a team this way, up to a considerable number of manager seats, more than enough for a genuinely large multi-location operation to give every relevant staff member their own accountable login rather than one shared password everyone uses.
Does WeLoyal have an API and webhooks?
For businesses whose point of sale system is not one of the ready-made integrations, or who simply want tighter, custom control over how loyalty data flows in and out, there is a full REST API sitting underneath everything described above. This is the same underlying system every native integration is built on top of, so nothing about using it directly puts you at a functional disadvantage.
Every card type has its own numeric identifier internally, and the API is built around specific actions that map directly to what a staff member does manually in the scanner: adding a stamp, adding or subtracting points, adding or subtracting a visit, recording a purchase amount, or issuing a reward. Each of these actions is scoped to whichever card types it logically applies to, so a "subtract visit" call works against a multipass or a limited membership card, while an "add stamp" call is specific to stamp cards, keeping the whole system logically consistent rather than a single catch-all endpoint trying to do everything at once.
Beyond transaction actions, the API also exposes full management functions: retrieving a list of all your cards, issuing a brand new card directly to a specific customer, pulling detailed information on an individual customer, updating or deleting customer records, retrieving your card templates, and sending push notifications programmatically rather than through the dashboard interface. For agencies and multi-location businesses, there are further endpoints for managing sub-accounts and reseller tariffs entirely through code. Authentication runs on a simple API key, found in your account's integration settings, and the system is rate-limited to a generous but firm ten requests per second, more than enough for real-time transaction processing, with clear error responses if that limit is ever exceeded.
Alongside the direct API, webhooks let your own systems get notified the instant something happens on the loyalty side, for example when a card gets installed or a reward gets redeemed, without you having to constantly poll for updates. And for businesses that do not want to write custom code at all, the same underlying actions are available through no-code automation platforms like Zapier, Make, Pabbly, Integrately, and several others, letting you wire loyalty actions into workflows built entirely through drag-and-drop logic, such as triggering a card issuance from a form submission, or logging every redemption into a spreadsheet automatically.
Why the operations layer matters more than the card design
It is easy to focus entirely on what a loyalty card looks like to the customer and treat everything on this side as an afterthought, but in practice, this is usually what actually determines whether a loyalty program survives contact with a real, busy business. A card design customers love is worthless if scanning it takes thirty fumbling seconds during a lunch rush. A points system is worthless if it requires a manual step your POS should have handled automatically. And a growing team is a real liability if the only way to give someone scanner access is handing them a password that also opens your revenue dashboard.
The scanner, the POS integrations, the manager permissions, and the API together are what let a loyalty program actually run itself, day after day, without becoming one more thing an owner has to personally babysit at the counter. If you want a wider picture of how retention fits together, read What is WeLoyal?, compare the card types, or book a demo to see the scanner and POS flows live.
Frequently asked questions
Do I need special hardware to scan WeLoyal cards?
No. The WeLoyal Scanner App runs in a browser on any phone, tablet, or computer with a camera and internet access. There is no dedicated terminal, dongle, or app-store install required for staff scanning.
Can customers use WeLoyal without downloading an app?
Yes. Customers install digital loyalty cards into Apple Wallet or Google Wallet. They do not need a separate WeLoyal customer app. Staff use the browser-based Scanner App on their own device.
What POS systems does WeLoyal connect to?
WeLoyal supports deep restaurant flows with Toast, plus marketplace-style connections for platforms such as Shopify, Square, Lightspeed, and GloriaFood. WooCommerce has a cashback-specific integration. Businesses outside those platforms can use the REST API, webhooks, or no-code tools like Zapier and Make.
What is the difference between an owner login and a manager profile?
The owner login has full account access. A manager profile is a separate staff login with permissions you choose, such as scanner-only access, customer editing, feedback stats, or template viewing, without opening revenue, billing, or report generation unless you explicitly allow those capabilities.
What is Kiosk mode used for?
Kiosk mode automatically accrues stamps, points, or rewards the moment a card is scanned, without extra button presses. It is useful for busy counters and mounted self-service devices. Only owners or administrators can change Kiosk mode settings.
Can I connect a custom POS or backend with the WeLoyal API?
Yes. WeLoyal exposes a REST API authenticated with an API key, rate-limited to ten requests per second, plus webhooks for events such as card installs and reward redemptions. The same actions are also available through no-code automation platforms.
Read more
How to Add Loyalty Rewards to a Shopify Store
How WeLoyal connects to Shopify: automatically enroll customers and credit rewards from real orders, whether they buy online through the storefront or in person via Shopify POS.
How to Connect a Digital Loyalty Program to Square
How WeLoyal connects to Square: automatically issue loyalty cards and credit points, stamps, or cashback from real purchase data the moment a sale goes through.

How to Connect a Digital Loyalty Program to Toast POS
How WeLoyal connects to Toast POS: automatic stamp, cashback, discount, and reward accrual down to individual menu items, with no separate scanning device required.